Best Android Rooting Tools

Most Android users have a general question how to find a best Android rooting tool to their Android device safely?Don’t worry,aim of this article is explained some important Android rooting tools for you.We explain here simply but if you need more details when you can click here to visit to required article and further download can get easily.

1.KingoRoot

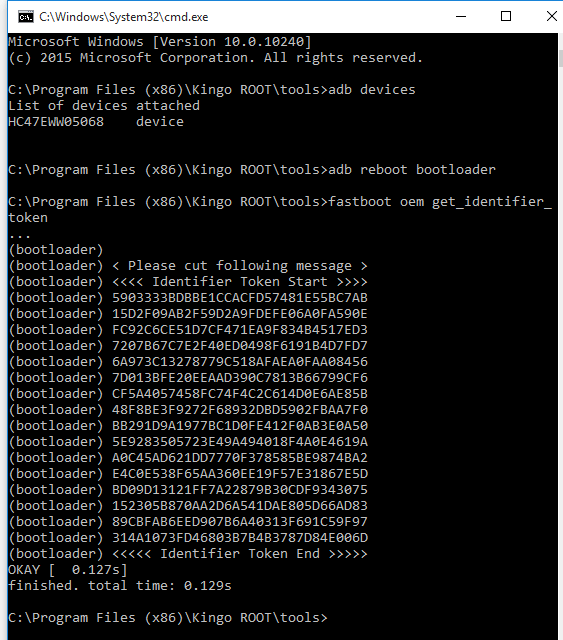
KingoRoot is one of the best Android Rooting Software to make Rooted Android Devices Easily.Other important facts is KingoRoot bring you most easier path to make rooted android device easily and safely.Read More

2.iRoot

The best User-Friendly One Click Rooting tool for all most all Android Devices which it brings a Speed Booster to speed up android & Battery Saver, Uninstall Bloatware & AdsRead More

3.TowelRoot

Best one click rooting tool which it is light weight software to root almost android devices easily.Other important fact is this rooting gain you most user friendly environment to proceed the rooting.Read More

4.KingRoot

KingRoot tool successfully rooted almost all Devices with few minutes of time which it means that KingRoot can root all JellybeanLollipop, Marshmallow and Nougat Android Devices easily. Don’t Delay to Root your Android to gain the full customization and fully controllable device. Additionally, try to use KingRoot to make the real android experience.Read More

5.FramaRoot

Framaroot is one of the best apps to root android Smartphone.Framaroot is a one-click rooting Android application created by the XDA user “Alephzain“. This root Tool application lets you to gain root privileges in your Android Devices(smartphone or tablet)  installing Superuser and SU binary in it. Although it lets you to root your Android device, it will also void the warranty of your smartphone or tablet too.Read More

6.Dr.Fone

Android Rooting is gained fully controllable OS on your Android Device using by Specific Android Program which it is called as Android Rooting Tool.After Rooting your Android Device(Smartphone & Tablet),you can easily remove or install any Android System Applications on your Android Device safely and without any barriers.Read More

7.Root Genious

Android rooting is an only way to gain privilege of totally control Android operating system.After your taken root access, your Android device can productively uninstall preinstalled system.files lead to run fast as well as can upgrade your device to the latest Android versions.Aim of this documentation is forwarding the details about Android rooting with the Wondershare Genius Root software .Support for Android 2.1 and up (Android 8.0 included).Pro Version includes so many Features than Free version.Read More

8.TunesGo Root

Android rooting is an only way to gain privilege of totally control Android operating system.After your taken root access, your Android device can productively uninstall preinstalled system.files lead to run fast as well as can upgrade your device to the latest Android versions.Aim of this documentation is forwarding the details about Android rooting with the TunesGo  Root Tool.Support for Android 2.1 and up (Android 8.0 included).Pro Version includes so many Features than Free version.Read More


Root Android using FramaRoot

Root Android using FramaRoot

FramaRoot is one of the best Android rooting tool which can exactly root most of the Android devices on the Android market, just with a single click. FramaRoot also, does not require to access with a PC and all, it does all things on device itself. The FramaRoot is packed with its own complex exploits which definitely vary from a device to another considering the built in chipset model and the version of the Android OS.

Older versions of FramaRoot is somehow complicated get thigs done with it but now it is extremely a one click root tool and it also offers one click unroot for the Android devices just with a one click too.

Framaroot is totally a free Android rooting tool and it is an instant solution for root geeks those who does not have enough knowledge about Android rooting.

Rooting Android devices with FramaRoot is really fast and simple to do. This is one also one of the safest method to get your Android rooted. Which is similar to KingRoot, KingoRoot, TowelRoot and iRoot.

Features of FramaRoot

Below here I have listed some of the features of FramaRoot, the stunning rooting app. So get to know what else FramaRoot offer to you as a one click rooting tool.

  • One Click Rooting
    You only have to select any of an exploit on FramaRoot and click the root button and your Android device is rooted.
  • Root without Computer
    The Whole rooting procedure is done by the app on your handset itself, FramaRoot will never require any PC, computer or laptop to help you while rooting.
  • SuperSU Easy Installation
    The SuperSU app provides permissions to root an Android. Still, while rooting your Android device with other one click rooting tools, you will have to separately install and setup SuperSU in order to better manage the root privileges. But with FramaRoot, it installs SuperSU itself on to the device and this saves a lot of our time.
  • Un-Root Android Devices
    Once you are bored with root access on your device, or if you don’t want your device to be rooted any more, then you can simply un-root it by single tap again with FramaRoot.

Advantages of rooting your Android device with FramaRoot

  1. Offers maximum level of customizing capabilities, such like having your own type of splash screen or favorite kind of a video on the boot screen.
  2. Full control over the device Kernel and CPU.
  3. Once your Android device is rooted with FramaRoot, you will have the possibilities to uninstall those bloatware which is always annoying you.
  4. To get some cool new experiences you can try installing custom ROMs.

Android Go Helps the Older Android Devices to Run Android 8.1 Oreo

  1. Can attach the xbox controllers to the handset, provides an extreme support to play games using the OTG feature.
  2. Can make huge revolution on battery life once rooting an Android device.
  3. Get with the latest Updates faster than ever before

Read more about FramaRoot and get to know more and how to install and use it…..

Read More

Install TWRP Recovery and Root HTC One M9 (All Variants)

Install TWRP Recovery and Root HTC One M9 (All Variants)

With no doubt the HTC One M9 is an awesome powerful beast on the market, the device looks similar to his brother HTC One M8. The HTC One M9 is powered with a snappy Snapdragon 810 processor and it is supported with a 3 gigs of RAM and they are hold by a capable 2840 mAh battery. With all that, the HTC’s Sense User Interface is one of the best custom OEM skin available for the HTC One M9 in the market.

Anyway the powerful HTC One M9 smartphone may still be tinkered with many more unique features and options from others. So, rooting the device is the basic concern of any Android device as it allows you to play with the system files and lets you access each and every corner of the device.

As with all that, now let’s see how to flash TWRP recovery and root HTC One M9. But before proceeding with such a procedure, you must first unlock the bootloader of your HTC One M9 to open entrance gate to flash the recovery image. If you still have not unlocked the bootloader of your HTC One M9, follow the guide that I have linked here to do so. This can done within few minutes.

How to Unlock Bootloader on HTC One M9

Pre Requirements

Now, simply get through the list of pre requirements below. Once you have fulfilled all of them, you can then proceed towards the instructions to root HTC One M9.

Download Files

  • TWRP Image
  • SuperSU zip

Install TWRP Recovery on HTC One M9

  1. Download the TWRP Recovery file provided in downloads section
  2. Once the TWRP image file is downloaded, transfer it to the folder where you have extracted the ADB & Fastboot files.
  3. Rename the file as img  (this is for your convenience)
  4. Now, Open command window in the extracted ADB & Fastboot files folder
    (by pressing Shift + Right clickon any empty space inside the folder and select Open command window here from the menu)
  5. Then connect your HTC One M9 with the PC, using a USB cable
  6. Once the device is connected to the PC, Reboot it into bootloader mode using the below command:
    adb reboot bootloader
  7. Now when the device is in the Bootloader mode, type in the next command to flash the TWRP image into it.
    fastboot flash recovery recovery.img
  8. Wait until the flashing process to be finished and when it is done use the below command to reboot the device
    fastboot reboot

That’s all, now you have successfully flashed the TWRP Recovery on your device and you are ready to root HTC One M9 by flashing the SuperSU binaries through the TWRP recovery.

Root HTC One M9

  1. Download the SuperSU flashable zipfile in the Downloads section
  2. Transfer the downloaded SuperSU into your HTC One M9’s internal storage.
  3. And the put your HTC One M9 in Recovery mode. To do this:
    • Turn down the HTC One M9 completely and press the Volume Downand Power buttons at the same time to boot into bootloader mode.
    • In the bootloader screen, highlight the recovery modeusing volume buttons and select it by pressing the power
  4. In the recovery menu, click the Install button and navigate to the superSU file to install the zip file.
  5. Once the file is installed the Phone will reboot itself.
  6. When your HTC One M9 reboots into the system, open the SuperSU app from the app drawer on the device and update the SuperSU binary if it is required.

Now you have successfully installed the TWRP Recovery on your HTC One M9 and either successfully rooted it.

If you have any doubts or issues with the above guide, feel free to let us know them through the comment section. Thank you….

KingoRoot

Kingoroot brings the fastest and trusted user friendly one click rooting software for almost all android Devices.

Kingoroot designs in both PC and Apk Versions by Kingoroot Studio.Kingoroot has higher success rate than other similar Android Root software.

Kingroot supports to root Android Versions such as Jelly Bean (4.1.2),Jelly Bean (4.2.2)

,Kitkat (4.4.2, 4.4.4), Lollipop (5.0.1, 5.1, 5.1.1),Marshmallow (6.0, 6.0.1) and Nougat (7.0, 7.1).

Why Root Android Device With Kingoroot

Rooting your Android Device with Kingoroot provides immense number of huge benefits easily.

Furthermore,Android rooting with Kingoroot opens ultimate potential to feel huge Android experience productively.

There are as below,

Kingoroot can speed up your Android Device easily.

Kingoroot can save battery on your Android Device.

Kingoroot helps to uninstall bloatware easily on your Android device.

Kingoroot helps to remove Ads on your Android device easily.

Kingoroot helps to get complete Backup easily.

Kingoroot helps to customization on your Android device properly.

Read More>>Why Root With Kingoroot

How To Root Any Android Device With Kingoroot

We know Kingoroot bring both version as Kingoroot Apk and Kingoroot PC.Do you like to know operation guide lines for the both versions?

1.How To Root Any Android Device With Kingoroot Apk

Kingoroot Apk is most user friendly Android Rooting software which it can use directly to root your Android Device easily….Read More

2.How To Root Any Android Device With Kingoroot PC

Kingoroot Pc is most powerfulAndroid Rooting software which it can’t use directly to root your Android Device easily.Anyway,you need exrenal support to get rooted android device with Kingoroot PC….Read More


How to Unlock Bootloader on Motorola Moto G5 via KingoRoot

The new released Moto handset has pulled in various customers. Controlled by a removable Li-Ion 2800 mAh battery, the mobile phone runs Android 7.0. The phone packs with 16/32 GB inside storage space which can be stretched out to 256GB through a microSD card. The phone goes with a 5.00-inch touchscreen appear with an assurance of 1080 pixels by 1920 pixels. Regardless of the way that the mobile phone has much central focuses that can vitalize various customers to get it. In any case, a couple of customers still to have their fascinating wireless. They may need to roll out improvements or change the structure records. A lot of customers may need to experience the Android O 8.0 but the producers reliably require a long time to give the invigorate.

However, anyone who wants to flash the newest Android version or make tweaks or modify the system file, he or she must unlock the bootloader of the Android. After unlocking the phone, you can make tweaks or root your Android for flashing new Android Version.

Before Unlock Motorola Moto G5

  • Device is powered on.
  • Battery level should be at least 50%
  • USB data cable (the original one is recommended)

How to Unlock Bootloader Motorola Moto G5

1.Backup important data

Understand,unlocking process may lose your all data so don’t forget to get backup on your Android device.You can use this tips to get backup easily on your android device.

2. Download KingoRoot

KingoRoot is top best and most user friendly root tool for free.The KingoRoot includes the Android  will download the LG USB driver automatically once connected to the PC.

    1. Download the KingoRoot to the PC.
    2. Install the KingoRoot.
    3. Connect the device to the PC via an USB cable.
    4. Enable USB debugging.
    5. Find the icon of KingoRoot and launch it.
    6. You need to Find the folder of KingoRoot where you install it,
    7. Now,you need to double click to open the folder of “Kingo ROOT”.
    8. Then,you can open the folder of “tools” under the folder of “Kingo ROOT”.
    9. Now,you need to input the letters “cmd” in the “address bar”, and enter.

unlock bootloader

9.The PC will pop-up a Command Prompt window, then run the command: adb devices

On the off chance that it demonstrates a serial number, your gadget is perceived and you can proceed with the procedure. Something else, guarantee you’ve played out the above advances effectively.

unlock bootloader

3. Get an Unlock Key.

    1. Okay,now you should head to your manufacturer’s bootloader unlocking page – Motorola unlocking page, create an account and then log in.
    2. Now ,you should run the command: adb reboot bootloader in the Command Prompt window. The device will be  booted into fastboot mode. Always keep the connection.

unlock bootloader

3.Utilize the Command Prompt window to recover your open key as portrayed by your maker. Run the order: fastboot oem get_unlock_data.

4.Select the token which is released by the Command Prompt window and reorder it into the appropriate box of the shape on your maker’s site with no spaces.

unlock bootloader

4.Now you should submit the form and wait for an email with a key or file that you will use in the next step.

Step 4: Unlock your bootloader of your Android device.

Here comes to play out the opening procedure. On the off chance that you haven’t intruded on the association and your telephone still in the fastboot mode ( If your gadget isn’t in the fastboot, at that point rehash the stage 2).

  1. Run command fastboot oem unlock UNIQUE_KEY, using the Unlock_code.bin file you received from Motorola email.
  2. Reboot your device by running command fastboot reboot or using the “Volume” buttons to reboot.

The gadget will demonstrate a message at boot expressing that your bootloader is opened. With an opened bootloader you will be permitted to root your Android, or install a custom ROM.

How To Root Any Marshmallow Android Devices With KingRoot

android_devices

Android Marshmallow for work update, users in every working field can benefit from its powerful functions. A lot of Android users want to enjoy not only the convenience for work but also the entertainment for living. They try to find an easy and safe way to root their Android 6.0/6.0.1 Marshmallow devices but in vain. Here KingRoot provides the easiest and best way for users to root their Android 6.0/6.0.1 with both KingRoot on Windows (PC Version) and KingRoot APK.

KingRoot provides safe and easy rooting methods for devices running Android 6.0/6.0.1 Marshmallow and packing with processors of ARM64 especially for your Samsung flagship handsets such as Samsung Galaxy S7 edge, Galaxy S7, Galaxy S6, Galaxy S6 edge and Galaxy 5 Galaxy Note 5 and Note 5 Duos. Most of the Samsung devices have the processors of ARM64, which means more powerful computing that devices with other kinds of processors such as ARM.

KingRoot strongly suggests that you tryKingRoot APK first, therefore it is easily operated by users without using an USB cable to connect the computer. Although the KingRoot APK is more convenient, the success rate to root the devices is lower than KingRoot on Windows (PC version). If you fail to root your Android 6.0/6.0.1 devices with APK version, the PC version is highly recommended.

What is ROOT?- Get a full complete Guide on Android ROOT!

What is Android Rooting?

If you use Android Smart Device when you are very familiar about Android Rooting.

The term of Root is derived from Linux Operating System but  Root is also most common in the Android platform.Furthermore,whole meaning of Android rooting similar to the Linux OS.Why Android Rooting gains you fully access to the system files and Apps as well as you can remove or add any Apps as your wish easily and safely.

Do you know what does that mean?

Rooting gains you super Access right on your Android Device.After Rooting,you can change,remove/delete/uninstall or add/install any system Apps easily without any restrictions.

Is Android Root any Risk or safest process?

Actually, Android Root is also included some risks similar to the other activities.But if you have perfect knowledge about android rooting when you can do it easily without any risks.

Otherwise,if you have not perfect knowledge about android rooting when you may delete many important system files quickly and easily.But you can solve it through the best  Android Rooting tutorials easily.

Generally,any android user can root their Android device using by executing scripts and Android rooting tools.

If you sue executing script when you need to bootloader unlock first,then you need to select any custom recovery program such as CWM or TWRP,after you need to install SuperSu,finally you can manage your android device as our wish.
how to root

But above process includes some complicated procedures so if you need to root your android device when you should try select automatic rooting tools.

Okay,second method is automatic android rooting tools for android rooting.You can use King root, Kingo root.TowelRoot,Wondershare Dr.Fone,Wondershare tunesGo Root,iRoot,Wondershare Geniuns Root and Frama Root to do rooting automatically, without manual script running.

Does Rooting Void Warranty?

You will lose your Android Device’s warranty why manufacturer do not permit to install other 3rd party Apps or changes of the stock firmware generally.But warranty period is finished one or 2 years.After warranty period,you can’t get any new updates.Anyway if you have root your android device when you can do it easily.

Is rooting Android legal?

Yes,it is deepened on the country you live why some countries do not give permission to rooting and other countries allow the Android Rooting.

In the United States, the rooting is  illegal. so you need to work under the DMCA (Digital Millennium Copyright Act).

root checker

If you live in Europe, the case is much clearer. The Free Software Foundation Europe (FSFE) has operated intensively around the root issue.

because of that you should know about regional facts or laws of rooting.you can get more facilities when you rooting your device.So you should careful and  avoid the illegal actions.

Gains of  rooting

you can get lot of gains using rooting Android.For the smart phone users have less number of limitation of root.It is one of the gain for smart phone users. It will helps to find the access to get more experience with root apps for Android devices.

Advantages-of-rooting-android-phoneFrom that you can get power to uninstall the unwanted apps like bloat wares in your device.these are the apps we mention above,

Some apps default by the manufacturer.those default apps take more space of you RAM.Titanium backup, Xposed framework, Greenify, Ad away are  some of the most essential root apps.

When your change the device or resetting ,some time your facing many problems because of missing data. by using any default apps or available unrooted apps you can’t solve that type of problems. Because it can’t make the backup quickly and broadly. But “titanium backup” can solve that type of problems so easily.it helps find backup in your device.

Likewise using Xposed Framwork(root apps), you can change tiniest details in your device successfully.


Android best root apps

Also if you want to do some modification of tweak some audio settings, flash a new boot animation or overclock your CPU a touch are available in your device after rooted.

After rooting you can get higher battery life by using Greenify app.It is the one of the best app for the automatic hibernation. For increase battery life Greenify app is not the only one solution. You can remove the bloatware apps from the device is the another method for improve the battery life.


ad block

There are two special benefits such as ad Blockers and full system automation with Tasker.

you can use one or more benefits of rooting  your device and it may not  limitations.So you can get unlimited benefits of root.

Disadvantages (Drawbacks) of Rooting

There are many advantages of android rooting. But it has some disadvantages also.

drawback on root

One of the main disadvantages is the official software updates not properly function. From that you will not experience with latest update of official software of your device manufacture of if you update the device may incompatible with that.

Another rdisadvantage is possibility of bricking the phone. Meaning of Bricking is instability or broken state of your system base. From that your device won’t boot and showing a dark screen.Some times it can be dead.

All these problems not common for the devices. But you have not ensure what you are doing ,you can face those problems.So,make sure to get proper instructions correctly about rooting methods.


root user

If you root your device, then your device warranty is not valid . So think about that matter if you have a new mobile device.But your device is more than 1 or 2 years or warranty period is finish, then you can go to root with out any problem.

Your device warranty will be gone. As I stated earlier, if you buy a new mobile it is a matter of thinking to do root or not! But if your device age is more than 1 or 2 year, you can surely go for the ROOT.

Rooting is effect for device security .So you should give more attention to security of device.Read More-source

Top Best Reasons Your Phone Slows Down Over Time

Phone-Slows-Down-Featured-670x335

Every Android users feel their Smart Device get lower performance over time.It nature of any device in the world.We can’t stop the further developments and so many improvement in the Technology.Your feel that your performance of the  Smart Device gradually slow down with time.Do you find what are reasons lower performance on your Smart Device?Yes of course ,don’t worry,aim of this documentation is finding the reason to lower performance and how fix that issues easily.Understand,this problem is not related only for the iOS and Android OS.It is similar problem for the all operating System in the current world.

Why Your Smart Device Get Lower Performance

1. Overloaded the Apps

We all are most like to collect so many thing,it is similar to Apps on your Smart Devices.Most Are useless and actually not required for the day to day operations.

2. Overloaded The Media Files

This is also general problem have to face any Smart Device easily.Media files are your pictures, music, videos, and documents.
If your phone accepts a micro SD card, these are the files you want to transfer to the card.or you can use cloud service to store your data easily.

3. Overloaded the Background Apps

Generally,most manufacturers added so many Apps on your Android Device.Anyway,they start their operation over the time.Otherwise most Apps are running as uselessly.

4.Memory Degradation

Any device fill on day by day over the time from contact details,video,audio,App,updates files,cache files and so many other files.think well,have you keep only required file on your Smart Devices? Not.All Smart users store so many useless files as well useful files over the time.Finally,your device memory space decrease gradually with time.

5. Hardware Failures

Generally hardware and Software of the Any Smart Device should be compatible each other but we always add some Apps and updates OS over the time. Understand that your Hardware is fixed but you change Apps on your Smart Device.Finally,it will be formed compatible device between hardware and Software on your Device.

6.Erased Some System Files

Generally,it can be erased any System files on your Android devices easily and quickly.think,we live in the highly developed and highly mechanized environment. So anytime ,Smart Device can be exposed to the high magnetic field easily.Anyway,final results are erasing your valuable System Files/OS

7.Dust and humidity

Dust and Humidity always make so many trouble on your Smart Devices easily.Think combination of dust and humidity make conductors so your device forms other circuits easily.Anyway  results gain you so many unexpected failures such  lower performance.

8.incompatibility of  ruining  Android OS and used Technology

Generally,Any Android Device need to new updates for better performance on the Devices.But Smart device user don’t try to updates their device after finished the Warranty why after Manufacturer warranty period,they do not forward the latest updates to your Smart Device.

9.Over Heating

Have you ever noticed how warm your Android device is? Overheating might be a huge problem as it will be slow down  your device performance. Also it can seriously harm the internal components.

How To Get Better Performance on your Smart Device

How To Solve above Mistakes And Doubt when you can get higher performance on your Smart Device easily.

1.Delete/Remove Useless Apps On Your Smart Device

Actually,this is easy task after rooting your Smart Device.Anyway,you don’t think to remove the useless Apps on your Smart Device with Stock Firmware.So you need to root your Android Device using by some compatible Android Rooting tool.Anyway,if you haven’t knowledge about it when you can follow this article as How to Uninstall/Remove/Delete System Apps 

Anyway,if you remove Bloatware/Useless Apps,your device memory space will be cleared easily and It will help to get better performance of the Smart Device.Anyway Android Rooting and Jailbreak are best option to delete bloatware/Useless Apps on the Smart Device.

How To select Best Rooting Tool For Android Device

2.Delete Cache File

It is also easy task,you can follow given steps to do it easily as below,

1.Head to the Settings menu. This can be done by tapping the cog icon in your notification shade.

2.Find Apps (or Applications, depending on your device) in the menu, then locate the app that you want to clear the cache or data for.

2. Tap on Storage and the buttons for clearing the cache and app data will become available (pictured above).

Anyway,if you delete ecache files o your device,your device memory space will be cleared easily and It will help to get better performance of the Smart Device.

3.Keep Backup on your Android Device

Keeping Backup on your Smart Device is also easy task in this era.You can use SD card or Cloud service to get Backup and keep it safely.Anyway,if you use external space to keep your data,your device memory space will be cleared easily and It will help to get better performance of the Smart Device.

4.Use compatible OS for the Hardware on your Smart Device.

Generally,any Smart Device includes strictly compatible Hardware and OS.It means that both side supports  each other.But over the time,your device’s Os  change with updates and some users Root or jail break their Smart Devices.Finally your OS and Hardware may be incompatible  each other. So keep it mind and work to protect the relationship together.This situation can occurred specially for the Android Devices why Android is most open source platform than iOS why after rooting any user can install Custom ROMs instead of the Stock ROM easily.But after installation of Custom ROMs,we need to protect to find compatible Custom ROMs for our Android Device.

5.Hardware failure

Meet your manufacturer or technician to make the faults.Anyway,if you have fulfilled all above requirements when you can’t reach the better performances ,it means that your device has technical trouble.

Some problems will be cleared after cleaning of your Smart Device.Anyway,your technical helper will be said what need to get better performance on your Smart Device.

Read More-How to Boost/Speed up Your Android with L Speed after Rooting with KingRoot APK

6.Take  an Action to Keep lower Heat range on your Smart Device

Considering this issue many developers has built apps to solve this issue.Anyway,If you have not solved it with Heat Managing Apps when you need to contact your technician quickly.

Root LG Nexus 4 with KingRoot

medium01

The Nexus 4 is manufactured by LG, and it is actually one of LG’s own device. So, it is always up to date with the latest version of LG. With your favorite LG services and Apps, cutting-edge Qualcomm Snapdragon & trade; S4 Pro processor and a vibrant 1280 x 768 4.7-inch display, Nexus gives hand for you with stunning speed and extreme power to access with stunning clarity and crisp.

Rooting your Nexus 4 will provide you even more freedom and power for your device. Among the plenty of rooting tactics, the best and easy way to root Nexus 4 is the, KingRoot. This method is also super fast

Pre Requirements

  • Charge your LG Nexus 4 at least up to 60%
  • Get a complete backup of your LG Nexus 4
  • Make sure to have a stable internet connection (Wi-Fi is recommended)
  • Enable Unknown Sources on your LG Nexus 4
    (Go to Settings > Security and enable Unknown sources here)

Tutorial to Root LG Nexus 4 with KingRoot

  1. Download KingRoot on to your LG Nexus 4 and install it
  2. If you have not allowed Unknown Sources in the Settings, the installation will be blocked, make sure to enable Unknown Sources
  3. Once the KingRoot is successfully installed, just open it and click Try it
  4. And then click Get now to start rooting your LG Nexus 4
  5. Now, when the device is rooting be patience, until the KingRoot finish the procedure
  6. That’s it, you would have successfully rooted your LG Nexus 4

Now you would have perfectly rooted your LG Nexus 4, you can check your Root status with Root Checker App, which is available in the LG Play Store.

If this method fails to Root your LG Nexus 4, then you can simply Root your device with KingRoot PC version. KingRoot PC version has the highest Success rate among all the other rooting tools (98% of success rate).

Root HTC One M7 with iRoot

Root HTC One M7 with iRoot

How to safely overlock HTC One M7 and gain a whole access on the device and get with maximum functions of the phone? This is the most frequently-asked question among the Android users. Considering this problem, the best way is to root your HTC One M7 at the very beginning to begin modifying. Once after rooting, you can easily break through all the barriers which are placed by the manufacturers and the carrier provider for your phone.

Root HTC One M7 with Computer – iRoot

Pre requirements

  • Prepare a working Windows PC and an original USB cable
  • Make a complete backup of your HTC One M7 before starting
  • Make sure you have a stable internet connection
  • Enable USB Debugging mode
  • Charge your HTC One M7 at least up to 70%

Root HTC ONE M7 with Computer – iRoot

  1. Download the iRoot PC version on your PC
  2. And then install it in the PC
  3. Once it is perfectly installed open it
  4. Now, connect your HTC ONE M7 to the PC through the USB Cable
  5. Once the iRoot app detects HTC ONE M7, click the Root button on the app interface
  6. Then wait until the procedure ends
  7. The iRoot will say succeeded and your HTC ONE M7 will reboot after it is rooted.
  8. That’s it!

Root HTC ONE M7 without Computer – iRoot

Pre requirements

  • Prepare a working Windows PC and an original USB cable
  • Make a complete backup of your HTC ONE M7 before starting
  • Make sure you have a stable internet connection
  • Enable Unknown Sources on your HTC ONE M7
  • Charge your HTC ONE M7 at least up to 70%

Root HTC ONE M7 without Computer – iRoot

  1. Download iRoot apk on your HTC ONE M7
  2. And then install it on it
  3. Once it is install, tap on the iRoot icon on your phone and open it up
  4. Now the iRoot will show you that your HTC ONE M7 is not rooted
  5. Now touch the Get Root access button to start rooting your device
  6. Then, iRoot will start rooting your HTC ONE M7, just be patience
    (this might take some time)
  7. Once it is done the HTC ONE M7 will reboot itself
  8. That’s it!

As explained you can root your HTC ONE M7 with any of the above method. With or without computer.